DomoAI now works inside the AI tools you already use. With the new MCP server and CLI, you can generate videos, images, and voiceovers from Claude, ChatGPT, Cursor, Codex and other MCP-compatible agents such as Antigravity, Kimi and Grok — no browser tab switch, no copy-pasting files between apps. The AI shows you a priced plan before anything is created, and charges your DomoAI credits only after you approve.
This post covers what you can make, how to set up, and what to expect.
What You Can Make
The MCP server exposes the same 12 creation capabilities available on the DomoAI website, with the same models, durations, and credit prices.
A few worth calling out:
- Character to Video (Move) — Upload a character image and a reference video. The character follows the reference motion. Available with Seedance 2.0 (ByteDance's model, integrated via API) and DomoAI 2.4.1.
- Talking Avatar — Combine a face image or video with audio to produce lip-synced speech. Up to 60 seconds on Pro and Team plans.
- Omni Reference — Create a new video from a mix of image, video, and audio references. Powered by Seedance 2.5 (ByteDance's model, integrated via API; up to 30 seconds, supporting up to 30 images, 10 videos, and 10 audio files) or MiniMax H3 (MiniMax's model).
- Image to Video — Animate still images with optional camera templates. Models include Seedance 2.0, DomoAI 2.5, and the DomoAI 2.4 family.
- Text to Speech — Preset voices, two-speaker dialogue, and voice cloning from a single sample (up to 20 cloned voices per account).
The rest of the lineup is there too: Text to Video, Frames to Video, Video to Video restyling, Image Editing, Text to Image, and image and video upscaling.
Set Up
The fastest way: send your AI agent the link to domoai.app/mcp, or paste the message below. It reads the setup guide, installs the CLI, and walks you through sign-in.
Please help me install the DomoAI MCP server by following the setup guide at https://www.domoai.app/mcp.md and complete the authorization process.
This works best with agents that can run terminal commands, such as Codex or Claude Code.
Manual setup
If you prefer to do it yourself, or if your client needs manual configuration (Claude Desktop, for example):
1. Install the CLI. Requires Node.js 22.12 or newer.
npm install -g @domoai/cli
The command is domoai.
2. Connect your AI tool.
domoai setup codex
Replace codex with claude-code, cursor, or claude-desktop depending on which tool you use.
3. Sign in.
Your AI tool will show a URL and a short code. Open the URL in your browser, sign in to DomoAI, confirm the code matches, and click Approve. Then restart the AI tool.
Other MCP-compatible agents — including Antigravity, Kimi and Grok — can connect too: add DomoAI as a local MCP server in the agent's MCP settings.
ChatGPT: use the ChatGPT desktop app. ChatGPT in the browser, and other products that only support remote MCP, aren't supported yet — there is no remote MCP server in this release.
How a Creation Works
Every creation follows a four-step flow:
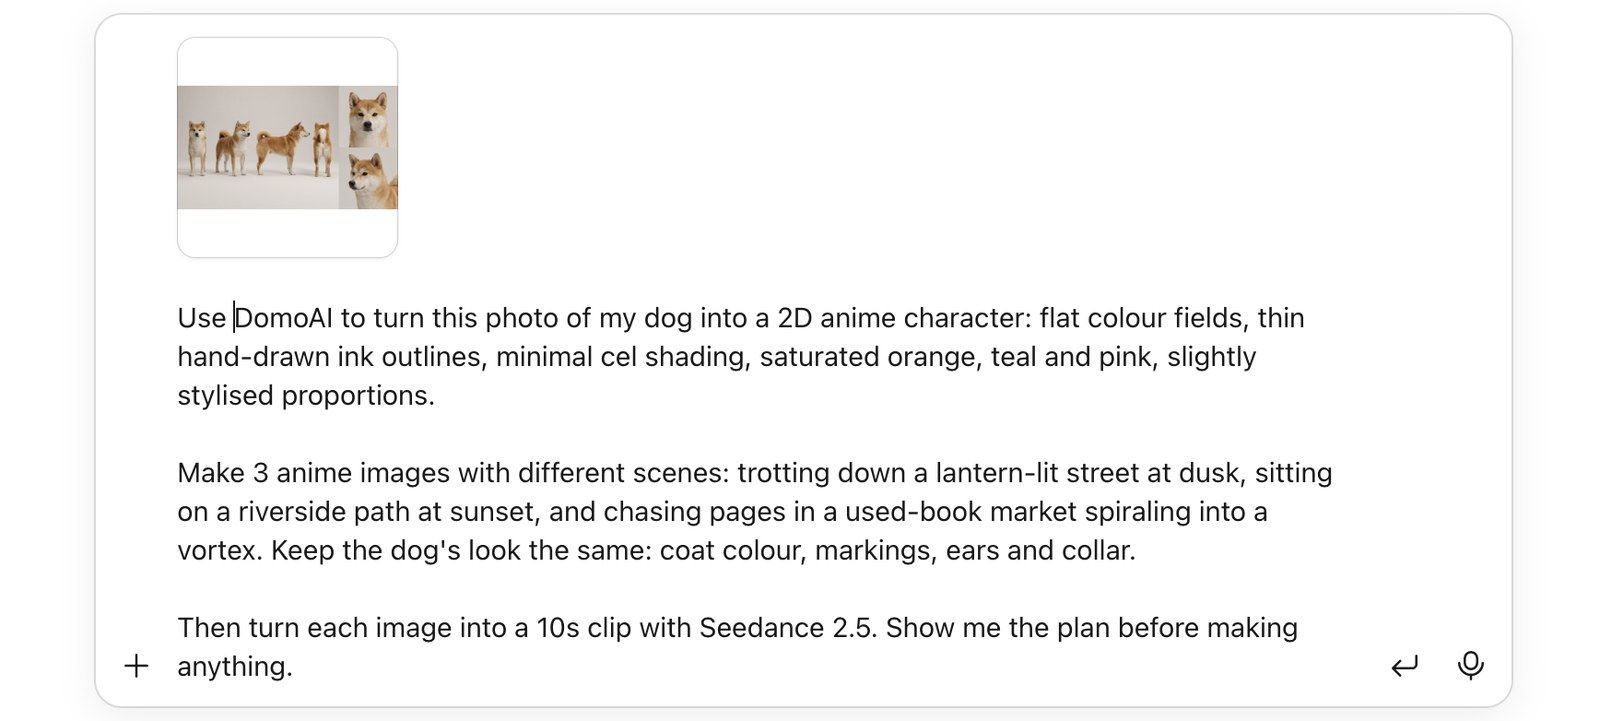
- Plan. You describe what you want. The AI calls DomoAI, which returns a plan showing the model, duration, resolution, estimated credits, and any blocker (unsupported input, low balance, plan limit). Nothing is created and nothing is charged.
- Approve. You review the plan and say yes. Some clients (Codex, for example) also ask you to allow the tool call.
- Create and charge. DomoAI generates the output and charges your credits — the same credit rules as on the website, on your personal or team account.
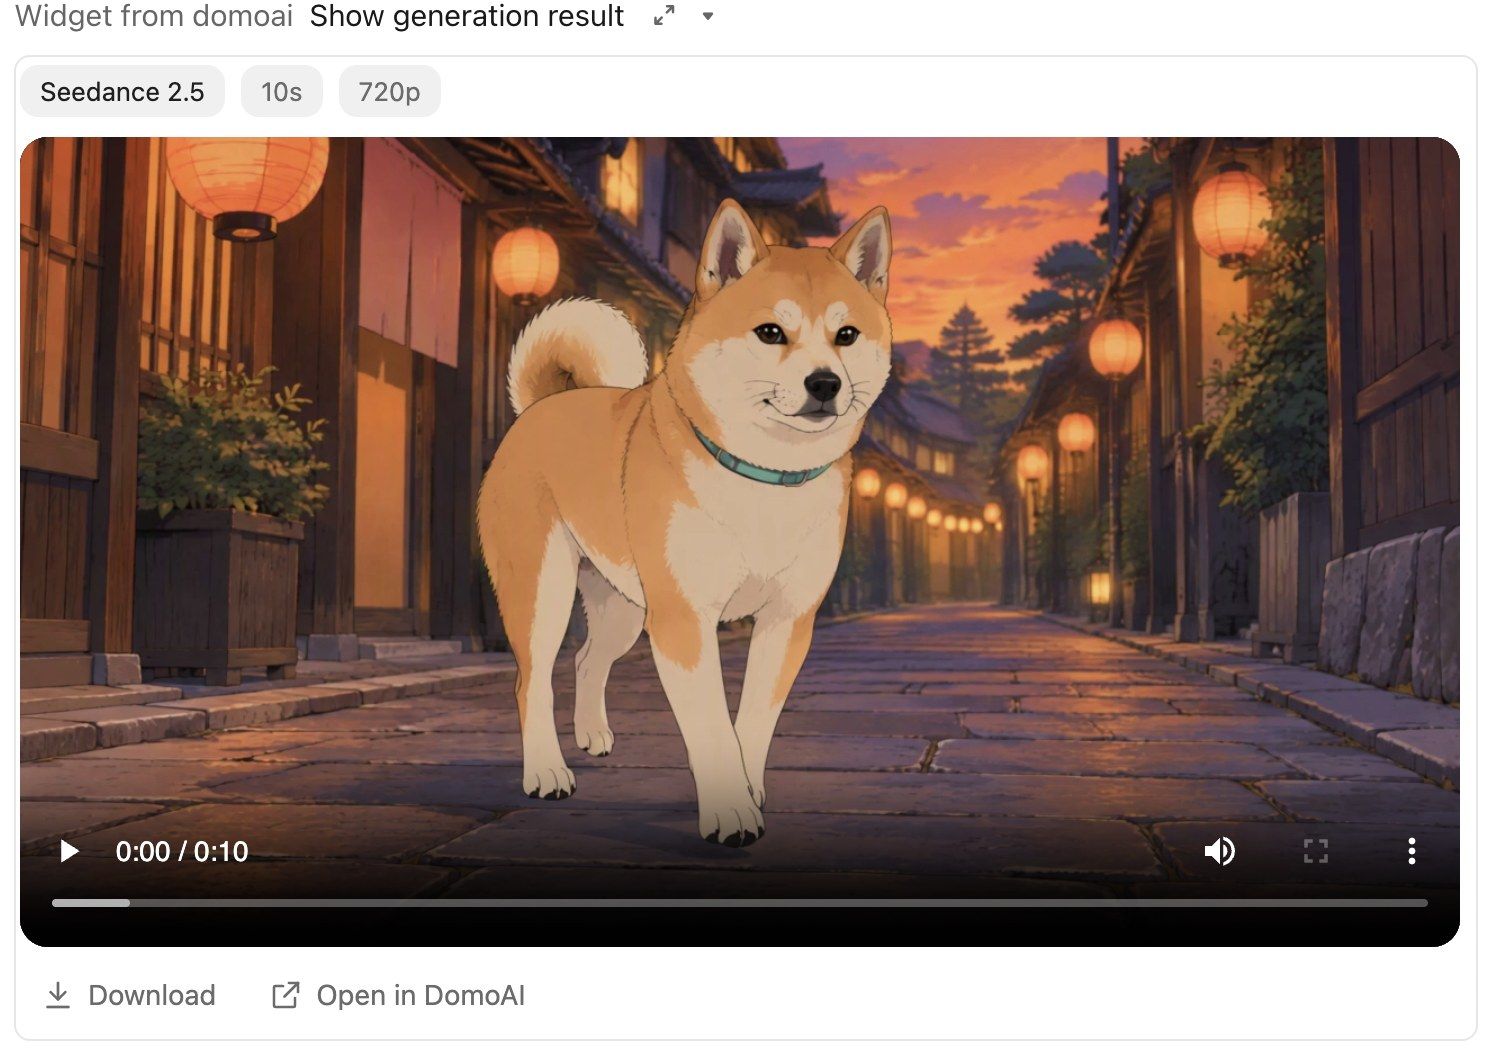
- Result. The AI checks progress. Supported clients display the image, video, or audio player directly in the chat. The result also appears in your DomoAI library.
Safeguards:
- If inputs or the price change after you approved, the server refuses to create and returns a new plan for re-approval. You are never charged more than you agreed to.
- A retry after a network error does not create or charge twice.
- When the length of an uploaded video or audio file is unknown at plan time, the plan shows a price range and charges by the measured length.
Use Cases
Here are three things you can try right away.
Remake a trend you saw on social
- Paste a TikTok, Instagram, or X link, or upload the saved video file.
- Add your own image — a character, a product shot, a pet.
- The agent breaks down the shots, camera moves, and timing, and writes the prompt.
- You review the plan and approve before anything is created.
Agents that can run commands (Codex, Claude Code) can fetch the video from a link; otherwise, save the video and upload the file. Only remake videos you have the right to use or remix.
1. Product ad from a link
Here is a product ad I like: [paste a TikTok link]. My product photo is product-hero.png. Use DomoAI Omni Reference with Seedance 2.5: treat the video as the camera and pacing reference, and the product photo as the subject. Write a prompt that puts my product into a similar ad structure. Show the plan before creating.
Turn yourself or your pet into an anime character
- Start from a photo of yourself or your pet.
- Use Image Editing to make the anime version.
- Reuse it as the reference for clips with Omni Reference (Seedance 2.5), dances with Character to Video, or VTuber-style talking clips with Talking Avatar.
- Using the same reference image across shots gives better consistency, though results will vary.
2. Photo to anime character, then a short clip
Use DomoAI Image Editing to turn my-photo.png into an anime character portrait (this can be you or your dog). Then use DomoAI Omni Reference with Seedance 2.5: use the anime portrait as the character identity (Image 1), and write a 10-second scene where the character walks through a neon-lit city at night. Show me the plan for each step.
Make production materials from a script
- The agent reads a script file in your project folder (Claude Code, Codex, Cursor).
- It breaks the script into shots and writes a prompt per shot.
- It plans character images, video shots, dialogue (Text to Speech), and talking shots (Talking Avatar).
- You approve each plan before anything is created or charged.
3. Break down a script and plan the shots
Read script.md. List the shots for scene 1, write a DomoAI prompt for each one, generate the character reference images first with Image Editing, then show me the plan for the video shots using those images as references.
Account Tools
The MCP server also gives your AI access to account-level tools:
- Balance — Check personal credits, subscription allowance, and team credits. The AI can show top-up and upgrade links for you to open.
- Team billing — Choose to pay with a team account instead of your personal credits, under the same rules as the website.
- Saved defaults — Ask the AI to save a default model and watermark setting per capability. They are stored on your account, so they follow you to another computer.
- Generation list — Browse past creations, including team work. Filter by capability, newest first.
- Image to Video templates — Access camera and effect templates for Image to Video.
- Cloned voices — Manage your Text to Speech voice clones (up to 20 per account).
- Watermark removal — Remove the watermark when the paying account's plan includes it.
Limits Worth Knowing
- Fast mode only. There is no Relax mode through MCP or the CLI.
- No Ghost Mode. For private, history-free creation, use Ghost Mode on the DomoAI website.
- One sign-in per account. Signing in on another computer signs out the previous one. This is by design.
- Prices match the website. Same credit costs, same plan gating. No MCP-only discount.
- Rate limits per account: 20 video creations/minute (300/hour), 30 image creations/minute (600/hour), 6 balance checks/minute.
- Node.js 22.12+ required. After upgrading Node.js, rerun
domoai setup <tool>. - Revoking access: Go to your DomoAI Account page > CLI & MCP > Revoke. This revokes authorization on all devices. Running
domoai logoutonly removes the local sign-in. - Plan gating matches the website. Some longer or higher-end options need a PRO plan — for example Video Upscale, Character to Video on DomoAI 2.4.1, Video to Video at 20 seconds and longer, and Talking Avatar at 30 seconds and longer.
Frequently Asked Questions
Which AI tools are supported?
Codex, Claude Code, Claude Desktop, and Cursor have one-command setup. Other MCP-compatible agents, including Antigravity, Kimi and Grok, connect DomoAI as a local MCP server. In ChatGPT, use the desktop app; ChatGPT in the browser and other remote-MCP-only products aren't supported yet.
Does MCP cost extra?
No. Credit prices and plan rules are the same as on the DomoAI website. There is no MCP subscription or separate fee.
Can I use my existing DomoAI account?
Yes. Sign in with your current account during setup. Your credits, subscription, team workspace, cloned voices and library are the same ones you use on the website.
What happens if a creation fails?
Credits follow the same rules as on the website. Before that point, you are never charged for a plan you did not approve: if the inputs or price change after approval, the server returns a new plan instead of creating, and a retry after a network error does not duplicate the creation or the charge.
Can I see results in the chat?
In supported clients, image, video, and audio players appear directly in the conversation. Every result is also saved to your DomoAI library, regardless of the client.
Is there a way to create privately?
Ghost Mode is available on the DomoAI website for private, history-free creation. It is not available through MCP or the CLI.
Can my team use this?
Yes. When you create, you can choose to pay with your team's credits instead of your personal ones, under the same rules as the website. The generation list includes team work.
Do I need to write prompts myself?
No. You can hand the AI agent your reference images and videos and describe the result you want in plain language. The agent analyzes the references, writes a detailed prompt, and shows you the plan before anything is created. You approve, adjust, or ask for changes — the agent rewrites the prompt and re-plans as needed. If you have a script file in your project folder, the agent can read it directly, break it into scenes, and write the prompts for each shot.
Get Started
Visit domoai.app/mcp for setup instructions, or run npm install -g @domoai/cli and domoai setup <tool> to start now.
The CLI also works on its own in a terminal — run domoai text-to-video, domoai balance, or any other command directly.
Questions or issues? Reach out to DomoAI support.